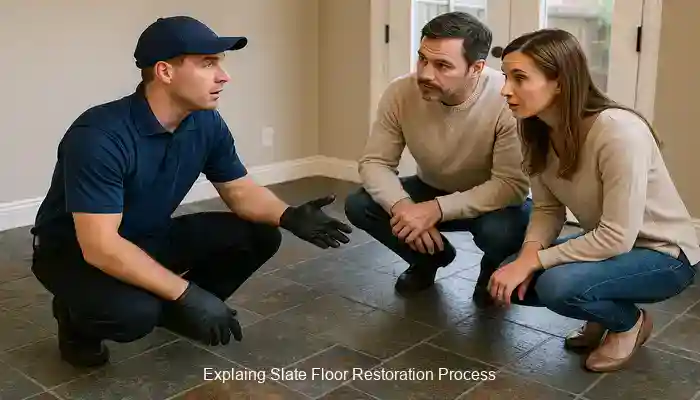
Last Updated on July 2, 2026 by David
How to Determine If Your Slate Floor Needs More Than Just Cleaning
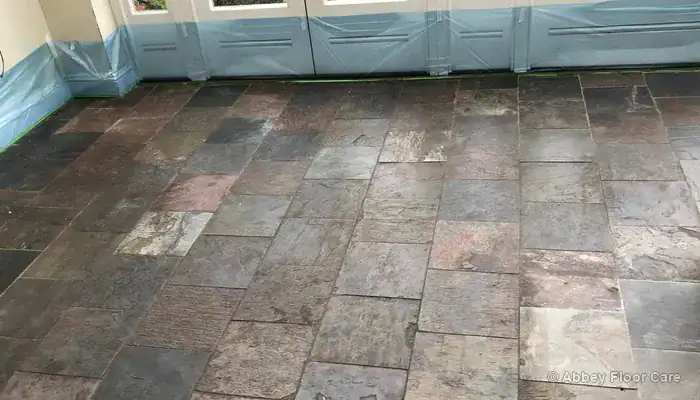
When your slate floor looks worn, dull, scratched, stained, or patchy despite regular cleaning, the issue is likely deeper than surface dirt. While standard mopping can remove topsoil, it cannot resolve underlying problems like uneven color fading, old residues from cleaning products, or minor surface damage that has built up over time.
Slate restoration becomes essential when the floor does not respond uniformly to regular cleaning efforts. In high-traffic areas such as kitchens, hallways, boot rooms, or bathrooms, the floor may still be structurally sound, but its visual condition can indicate that the protective layer has deteriorated. Signs include wear along busy pathways or old treatments that have settled into lower areas, failing to shield the tiles effectively.
What Causes Dullness That Lingers After Mopping?
If your slate displays flat grey patches that remain visible even after thorough cleaning, the problem extends beyond just dirt. The floor may appear worn out due to a loss of its original depth in frequently trafficked zones, especially where grit has been consistently walked across the same path.
Dullness often first appears around doorways, in front of sinks, beside kitchen islands, and along main corridors connecting rooms. These worn areas can have a chalky look, while less trafficked sections may maintain a richer appearance due to less wear.
Color fading in slate signifies a distinct change in how the surface reflects light and retains tone. Homeowners generally notice a decline in color rather than overt stains, which can lead to the temptation to use harsher cleaning methods. The initial sign is usually that the floor appears clean but lacks vibrancy.
How to Spot Scratches and Marks From Foot Traffic
If your slate shows fine scratches, dull trails, or light scuffed areas from regular foot traffic, the pattern often corresponds with daily movement through the space. Shoes, pet claws, grit, and moved furniture can leave subtle marks that accumulate, resulting in an uneven look rather than merely signs of wear.
Traffic wear can give the impression of neglect on an otherwise sturdy slate floor, even when the tiles remain structurally intact. Pay attention to whether the marks form in repetitive lines, arcs, or paths, as these patterns often indicate varying levels of restoration needed compared to random marks.
Removing scratches from riven floors is limited by their natural texture, as the goal is to preserve the surface character rather than flatten it. A fine-honed slate floor has a smooth, consistent surface that disperses light evenly, while an impregnating sealer maintains the natural riven texture, and a topical sealer adds a subtle shine.
How to Address Patchy Stains, Residue Buildup, and Ineffective Protection
If your slate features dark patches, white stains, paint residues, mineral deposits, or trapped contaminants after renovations, an assessment is essential before applying any sealer. Renovation debris can leave building materials lodged on the tile surface, resulting in a finished floor that appears worse after sealing if surface preparation is insufficient.
Failed protection often shows up as uneven gloss, water marks, cloudy spots, or areas that darken more quickly than the rest of the floor. Hard water in UK homes can leave chalky white marks around wet spots, while excessive moisture during mopping can shorten the lifespan of the sealer when standing water is repeatedly left on the textured surface.
Discolored grout can also add to the overall impression of neglect. Dirty water, detergent residues, and cloudy mop water can settle in grout joints, making the slate floor look dirtier than it actually is, even if the tiles themselves only require careful deep cleaning and resealing.
How to Identify Old Coatings in Edges and Recessed Areas
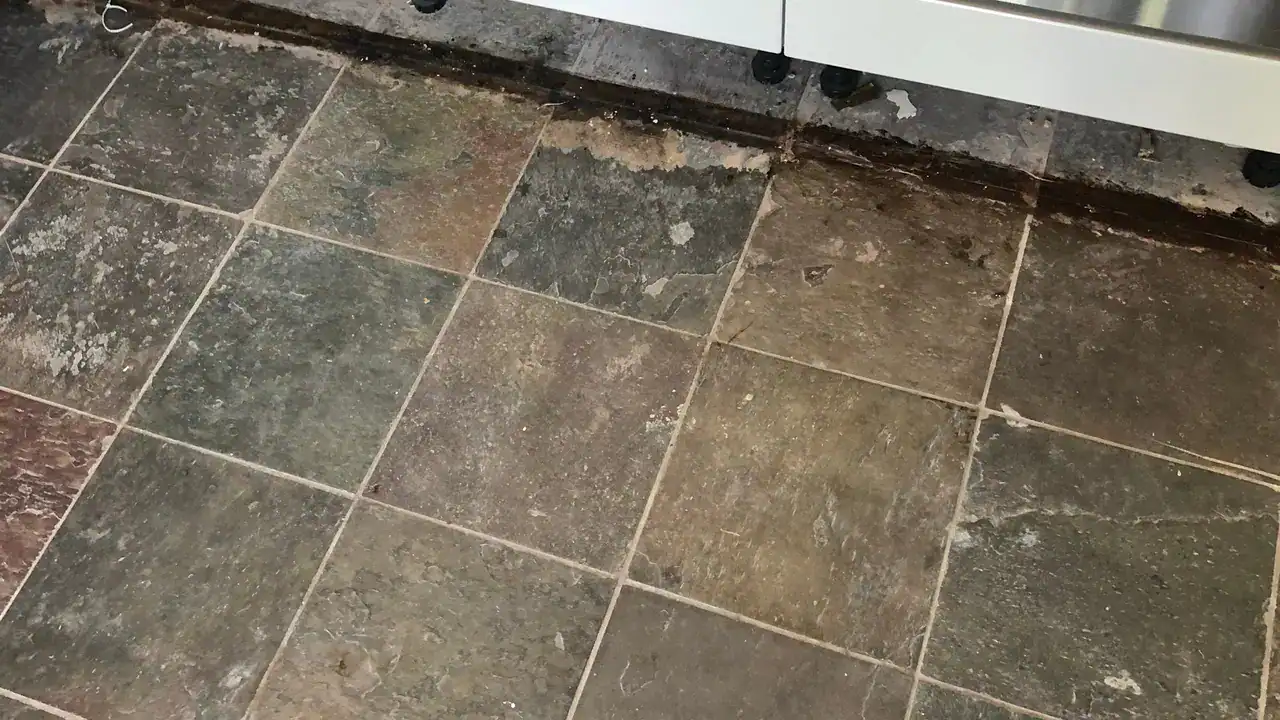
If your floor has darker edges, sticky spots, or patchy low-sheen areas, an accumulation of old coatings may be affecting the finish. Edge buildup is common where previous products were excessively applied, where mops have pushed residue into the room’s corners, or where old acrylic coatings have lingered in low-wear zones.
Visible sealer buildup occurs when topical excess gathers in recessed areas, creating inconsistent finishes across the floor. Application residues can make some tiles look shiny, others dull, and some appear dirty even after cleaning, leading to an overall blotchy appearance.
The presence of residue lock-in indicates that cleaning alone will not restore the floor. The surface may feel slightly sticky, look cloudy in certain lighting, or show darker patches where furniture has been placed. This suggests that the old finish needs addressing as part of the restoration process.
Recognising Minor Damage That Affects Restoration Strategy
If your slate displays chips, small cracks, flaking edges, or open holes in honed-filled tiles, restoration is still possible, but it requires more than just cleaning. Filler collapse refers to the breakdown of factory fillers in honed-filled tiles; homeowners will notice filler loss, exposure of voids, or small holes. The proper approach involves removing the failed material before refilling and sealing.
Delamination signifies layer separation within the slate; homeowners will see flaking, lifting edges, or thin sheets breaking away. The solution involves stabilisation or replacement in areas where structural breakdown has occurred. Since slate forms in layers, this visible condition requires repair considerations rather than just scrubbing harder.
Efflorescence appears as a white, chalky residue caused by mineral salts that remain after moisture evaporates. Homeowners will observe haze, pale deposits, or repeated white markings near grout or wet areas. The solution involves moisture evaluation, careful residue removal, and thorough drying prior to sealing. Hard-water mineral deposits can present similarly, so restoration decisions must be based on specific testing results.
Proper maintenance of the slate floor extends its lifespan by removing grit before wet mopping, using pH-neutral cleaning agents, and resealing at appropriate intervals. A professionally restored and correctly sealed floor is significantly easier to maintain than one that is worn or improperly treated. Effective maintenance routines are discussed in how to clean slate floors when they appear dull. Avoid steam cleaning, as heat can soften protective layers, drive moisture into the surface, and lead to coating degradation on vulnerable floors.
How Incorrect Restoration Methods Can Exacerbate Slate Damage
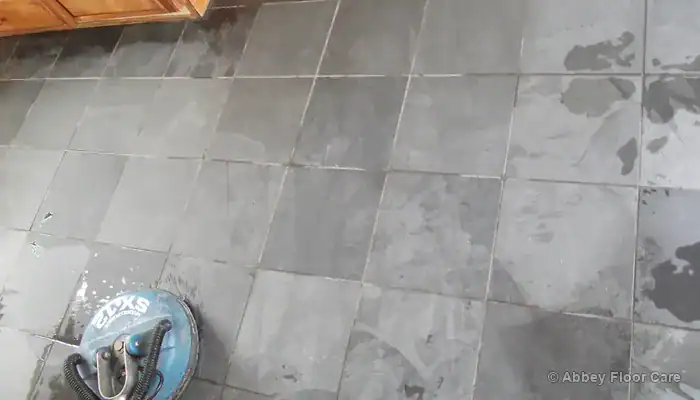
Rushing into stripping, scrubbing, sanding, or sealing can turn a manageable slate issue into visible surface damage. Slate has a mineral structure that forms in layers, which means that weak boundaries, cleavage separation, and flaking risks must be evaluated before implementing aggressive techniques. Problems with slate floors that fade unevenly underscore the necessity of avoiding assumptions regarding color loss and surface damage.
Always conduct tests on the floor first, as improper treatment can worsen slate damage.
Incorrect stripping methods can soften old coatings without fully removing them, allowing dissolved residues to spread into recessed areas. A solvent-based stripper works by utilizing solvent action, acrylic removal, wax dissolution, and controlled chemical penetration. Coating stripping must be followed by effective residue removal to prevent it from drying back into the surface.
What Professionals Require for Effective Slate Floor Restoration
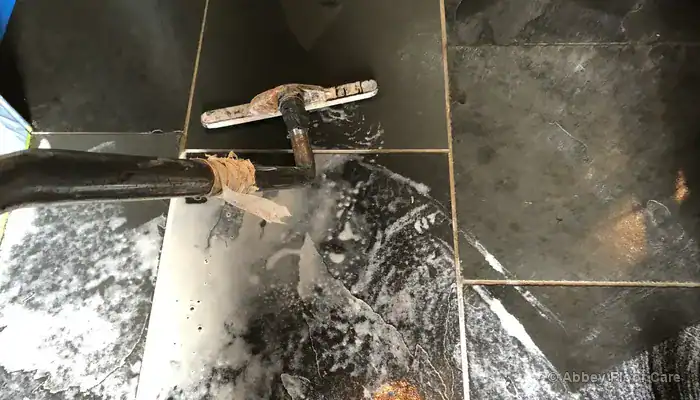
A wet vacuum or slurry extractor is not just cleaning equipment; it plays a vital role in removing loosened soil, residue, and rinse water before they can dry back into the slate. Slurry extraction on a riven surface effectively controls residue removal, avoids redeposition, and manages contamination after agitation, making a wet vacuum essential in professional processes.
Professional preparation involves using appropriately matched tools instead of applying a single aggressive method across all types of floors. A low-speed rotary machine, polypropylene brushes, nylon detail brushes, microfiber cloths, repair materials, test sealers, and a solvent-based stripper are chosen based on the floor’s existing coating, edge buildup, recessed areas, and dry condition.
Utilizing the right equipment ensures a consistent matte finish prior to sealing, as softened contamination is effectively removed rather than spread. Incomplete work can trap dirty solutions in the surface texture, while controlled extraction, thorough rinsing with fresh water, and drying checks simplify ongoing maintenance and prepare the restored floor for the appropriate protective sealant.
How to Identify the Correct Slate Restoration Process for Your Floor
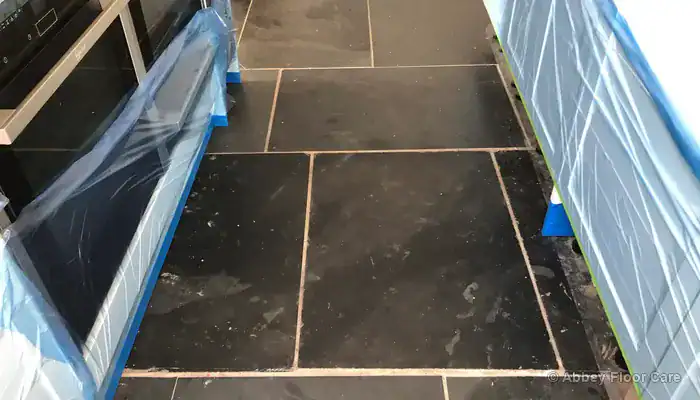
If one slate floor needs deep cleaning while another requires sealer removal, repair, honing, or sealing, the distinction lies in the floor’s condition rather than the type of stone. Professional evaluation shifts focus from visible symptoms to the correct restoration method, ensuring that the process adapts to the floor rather than forcing every tile through a uniform treatment.
Diagnostic assessments help differentiate surface preparation from deeper corrections. Building residues, white staining, paint marks, mineral deposits, and trapped contaminants indicate renovation contamination and the need for controlled stain removal, while failed coatings suggest sealer removal, rinse management, and drying before applying any new finish.
- Check whether water beads up, soaks in, or darkens in high-traffic areas.
- Inspect edges, grout joints, and recessed textures for old coatings or residues.
- Test smaller areas before proceeding with stripping, repair filling, sealing, or aftercare planning.
- Align the restoration method with the desired outcome: matte finish, wet-look finish, or low surface sheen.
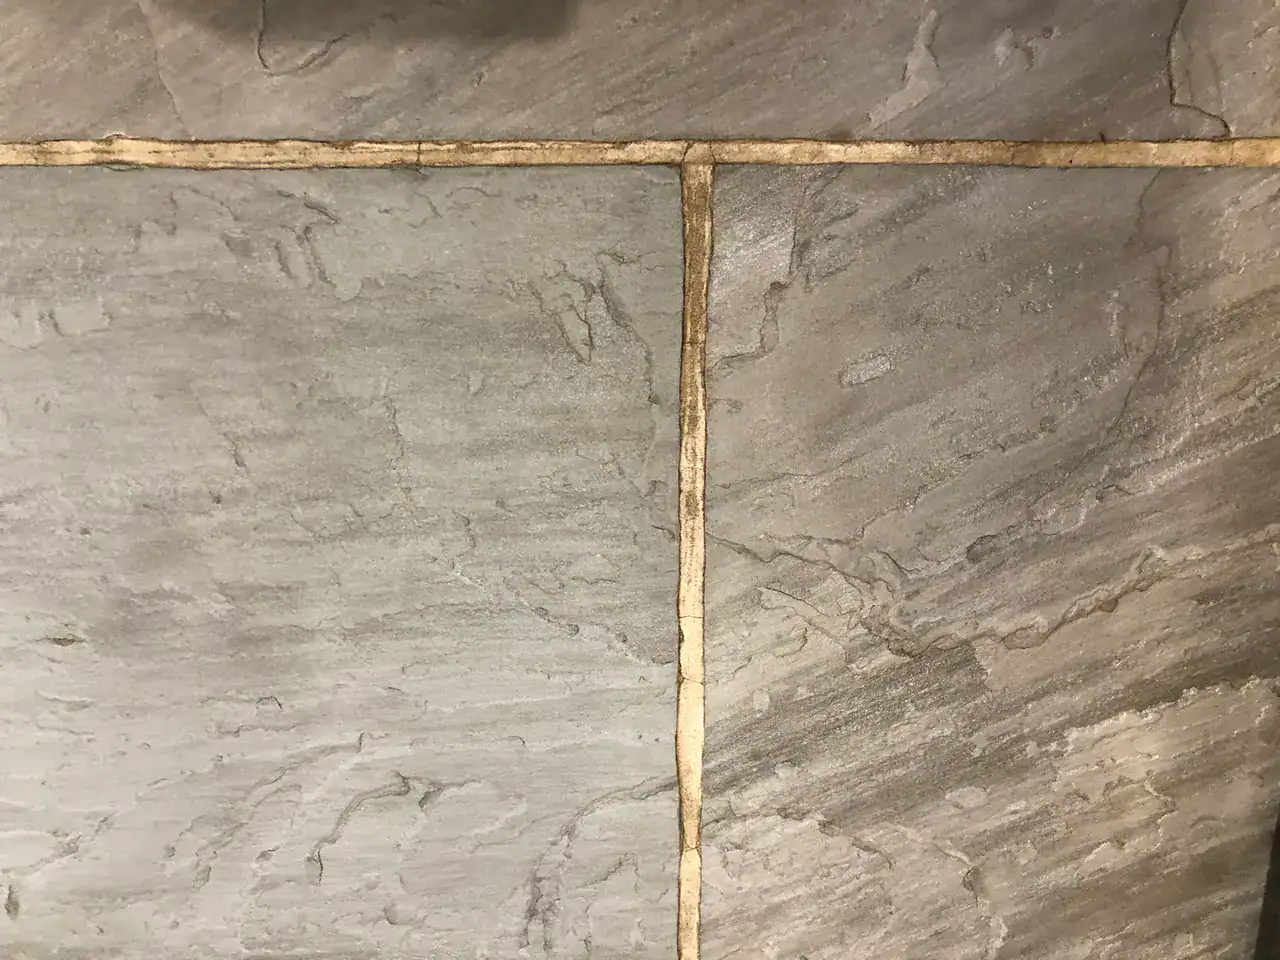
Planning the outcome helps safeguard the floor after intervention. A tailored maintenance handover includes pH-neutral cleaning, grit removal prior to wet mopping, and resealing intervals. Broader slate care is outlined in slate floors in UK homes. Proper restoration typically results in a significantly improved appearance compared to pre-intervention conditions, and in many cases, it will look better than when first installed, as the correct sealer enhances the stone’s natural color.
What Are the Next Steps for Comprehensive Slate Floor Care?
Effective slate floor care guidance allows readers to differentiate restoration from cleaning, sealing, repairs, and long-term maintenance before making informed decisions. A floor affected by old coatings, grout issues, tile replacements, aspirations for a wet-look finish, or concerns about water resistance may require multiple articles to arrive at the right conclusion.
Slate care is most efficient when each topic is clearly defined. Restoration encompasses the entire corrective process, while routine cleaning, repair decisions, and sealing options require specific details. The broader roadmap is available in complete slate floor care guidance. Ongoing maintenance is crucial for prolonging the lifespan of the floor, as pH-neutral cleaning, grit removal, and timely resealing help preserve the restored surface.
Recommended products for slate maintenance include cleaning solutions: Fila Pro Floor Cleaner, Lithofin Easy Care. Suggested equipment includes: Vileda H2PrO Spin Mop System.
BIO_PARAGRAPH: David Allen has been restoring slate floors across the UK for over 30 years with Abbey Floor Care, addressing challenges such as worn riven floors impacted by old coatings, traffic wear, and ineffective sealing. His approach to slate restoration emphasizes thorough assessment, careful residue removal, appropriate repairs, and selecting the right sealer based on the floor’s condition.
The Article Slate Floor Restoration: Recognising When Cleaning Isn’t Enough was first published on https://www.abbeyfloorcare.co.uk
The Article Slate Floor Restoration: When Cleaning Falls Short was first published on https://fabritec.org





No responses yet